Configuration
Create Project
create a new Django project and an app within it:
django-admin startproject myproject
cd myproject
python manage.py startapp myapp
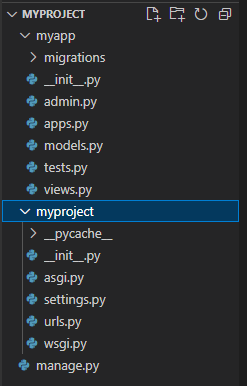
Folder Structure like below
migrate Database
python manage.py migrateRun Server
python manage.py runserver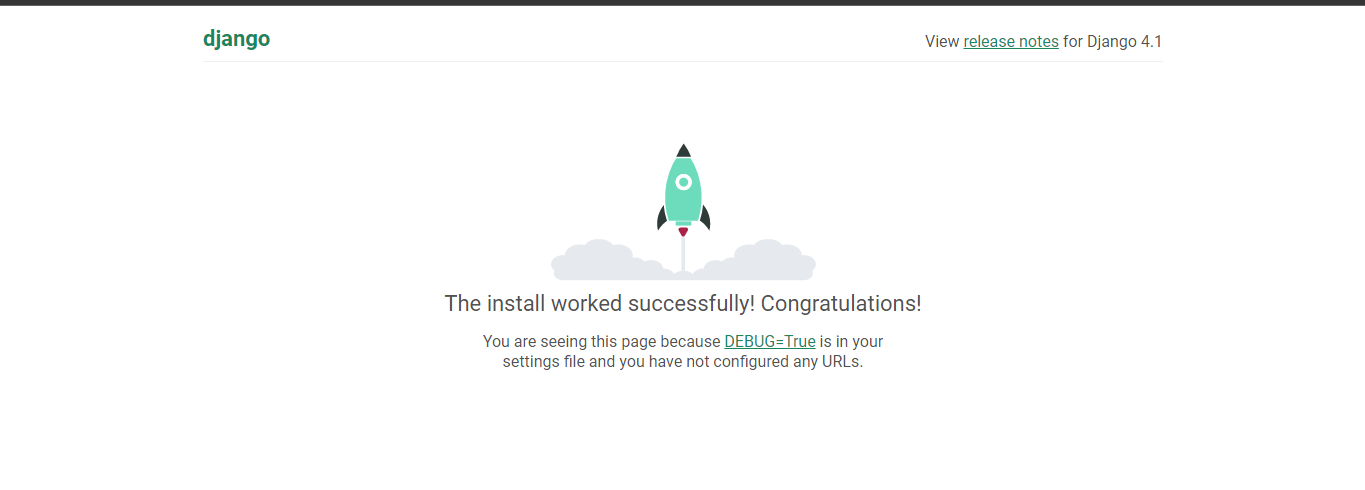
Install Required Packages:
pip install django-allauth==0.43.0Configure Settings:
#------------ AllAuth 1 -----------------
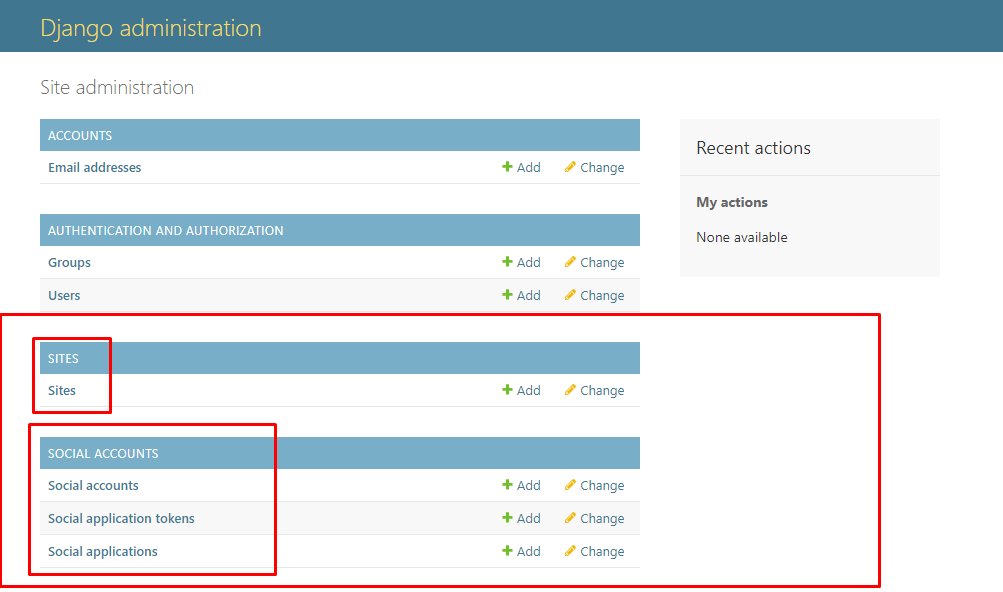
INSTALLED_APPS = [
# ...
'django.contrib.sites',
'allauth',
'allauth.account',
'allauth.socialaccount',
'myapp', # Replace with the name of your app
]
# Add this line if it's not there
SITE_ID = 1 Migrate Database
python manage.py migrateCreate Super user
python manage.py createsuperuser#------------ AllAuth 3 -----------------
AUTHENTICATION_BACKENDS = (
'django.contrib.auth.backends.ModelBackend',
'allauth.account.auth_backends.AuthenticationBackend',
)
login admin panel

TEMPLATES = [
    {
        # ...
        'OPTIONS': {
            'context_processors': [
                # ...
                'allauth.account.context_processors.account',
                # ...
            ],
        },
    },
]
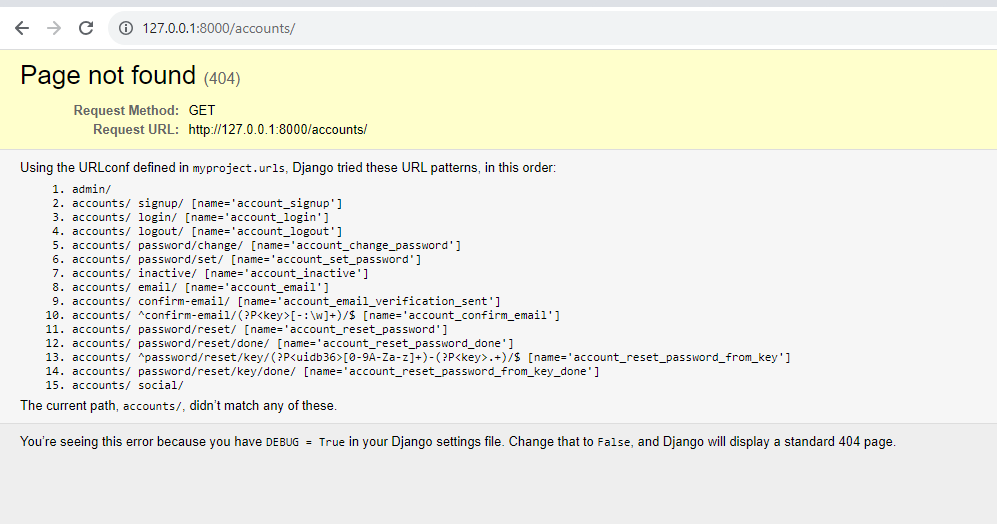
Configure URL patterns:
# myproject/urls.py

from django.contrib import admin
from django.urls import path, include

urlpatterns = [
    path('admin/', admin.site.urls),
   path('accounts/', include('allauth.urls')),
   ]
http://127.0.0.1:8000/accounts/ এ ঢুকলে দেখতে পারবো আমাদেরকে অনেক গুলো লিংক দিয়েছে
একাউন্ট logout করে signup ইউআরএল এ ঢুকার চেষ্টা করি।
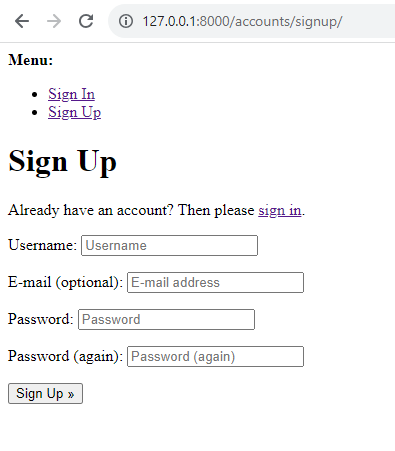
এখন আমরা দেখতে পাচ্ছি যে ডিফল্ট পেজ শো করছে এর পরের টিউটোরিয়ালে আমরা টেম্পলেট কাস্টোমাইজে কাজ দেখবো
allauth Template Customize
আমরা ডিজাইন পরিবর্তন করার জন্য আমাদের প্রজেক্টের টেম্প্লেটস ফোল্ডারে allauth টেম্পলেট কে রাখবো আর পরিবর্তন করবো।
আমরা টেম্প্লেটস ফোল্ডার সেটিংস করে ফেলি settings.py তে
'DIRS': [os.path.join(BASE_DIR, 'templates')],
আমরা পাইথন environment এ যেখানে allauth ইনস্টল করেছি Lib > site-packages > allauth > templates > account সেখান থেকে টেম্পলেট গুলো কপি করে প্রজেক্টের টেম্প্লেটস ফোল্ডারে নিয়ে এসে ইচ্ছামত মোডিফাই করতে পারি।
forgot pasword
settings.py
#gmail_send/settings.py
EMAIL_BACKEND = 'django.core.mail.backends.smtp.EmailBackend'
EMAIL_HOST = 'smtp.gmail.com'
EMAIL_HOST_USER = 'olee.techs@gmail.com'
EMAIL_HOST_PASSWORD = 'jzsbfkxvmxiabwow' #past the key or password app here
EMAIL_PORT = 587
EMAIL_USE_TLS = True
DEFAULT_FROM_EMAIL = 'from oleetech'
Google Login
INSTALLED_APPS = [
# ...
'allauth.socialaccount',
'allauth.socialaccount.providers.google',
# ...
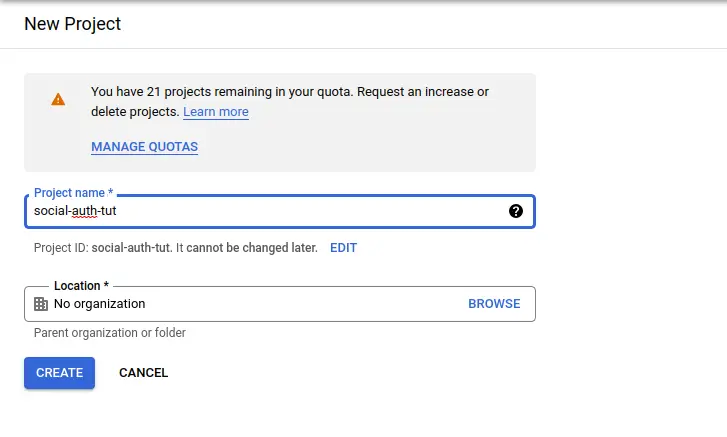
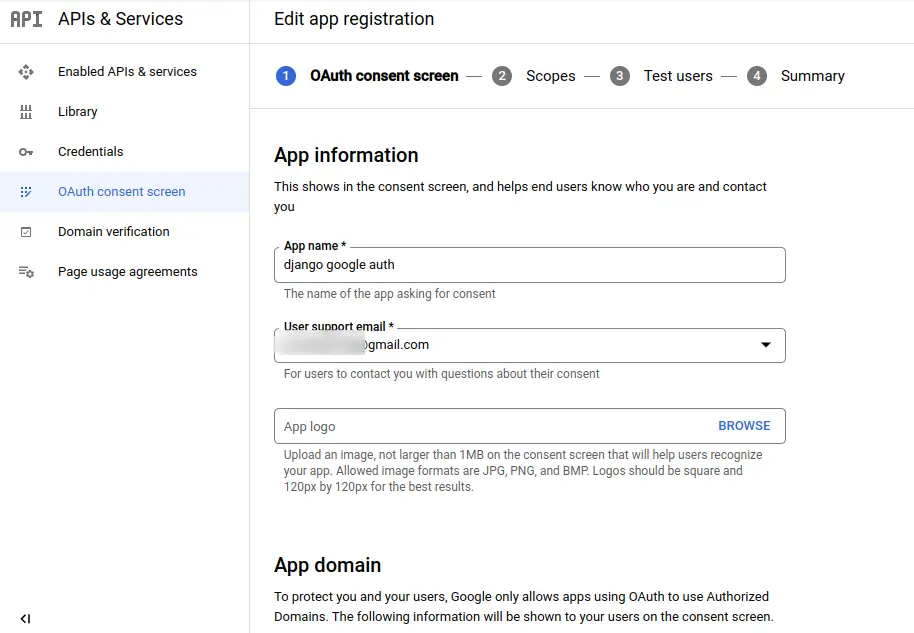
]First, go to https://console.cloud.google.com/apis/ and create a project.
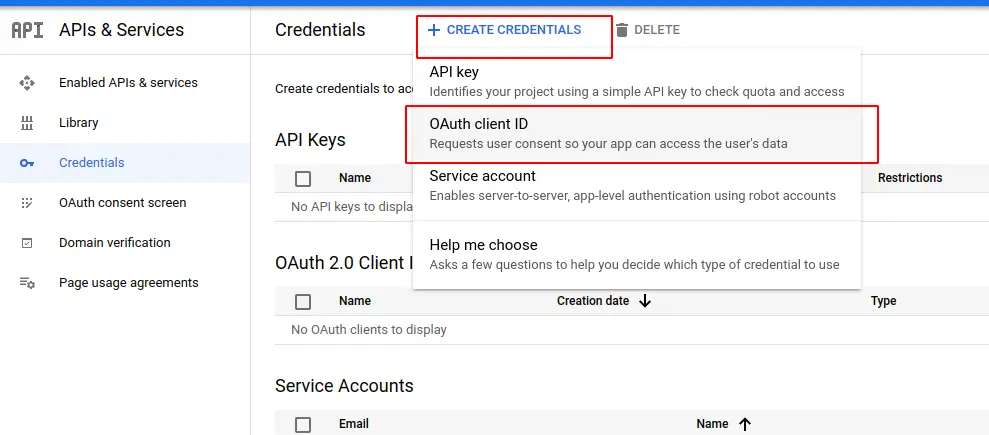
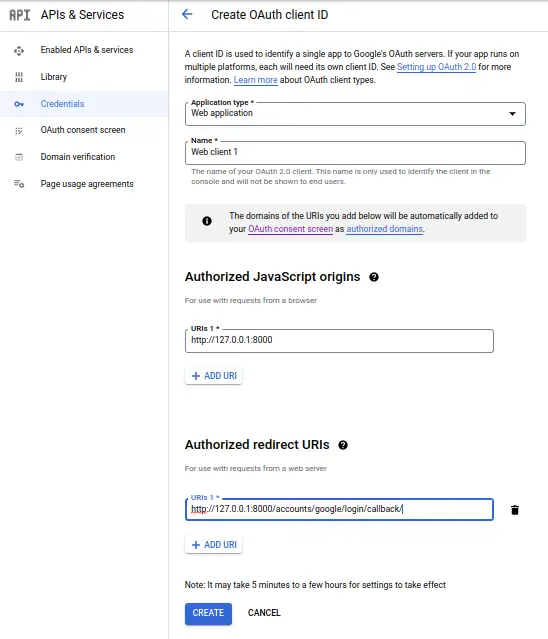
Click on it and choose web application, and add these two URLs,
http://127.0.0.1:8000 for Authorized JavaScript origins
http://127.0.0.1:8000/accounts/google/login/callback/ for Authorized redirect URIs
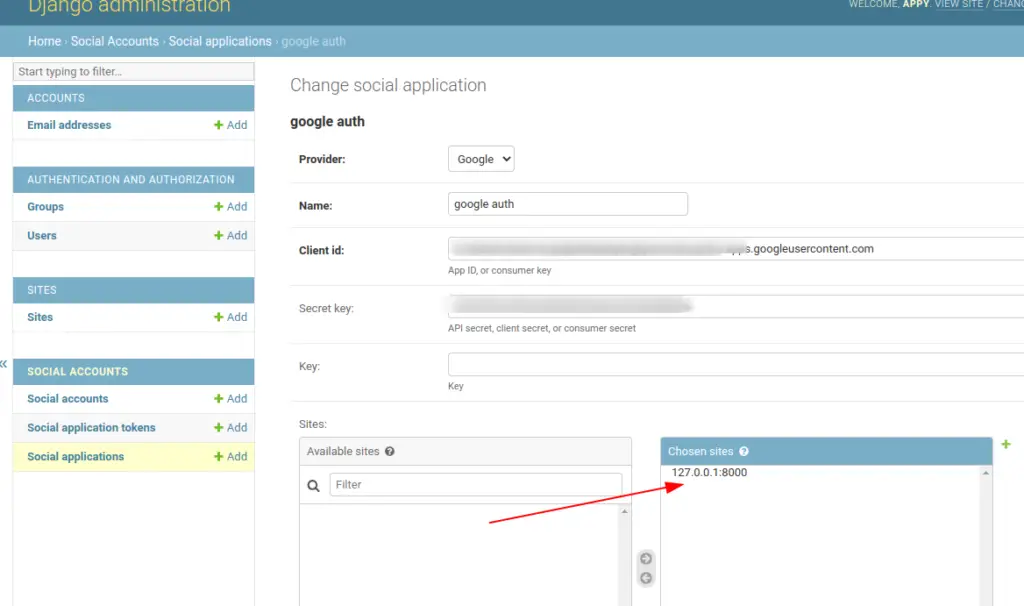
Now run the server using python manage.py runserver and open admin. Go to this page http://127.0.0.1:8000/admin/sites/site/1/change/ and make these changes,
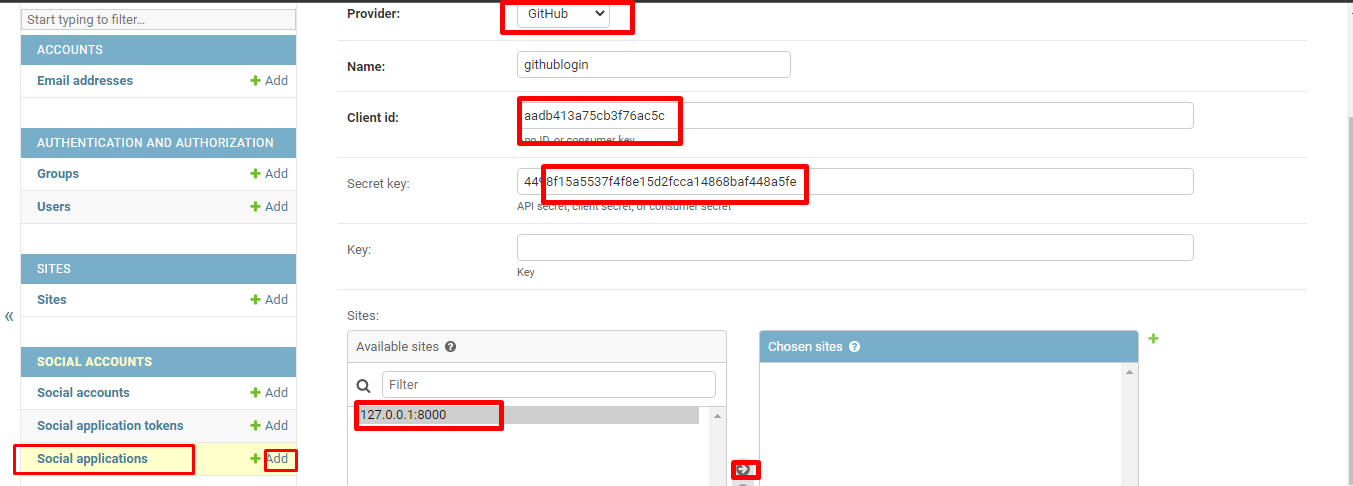
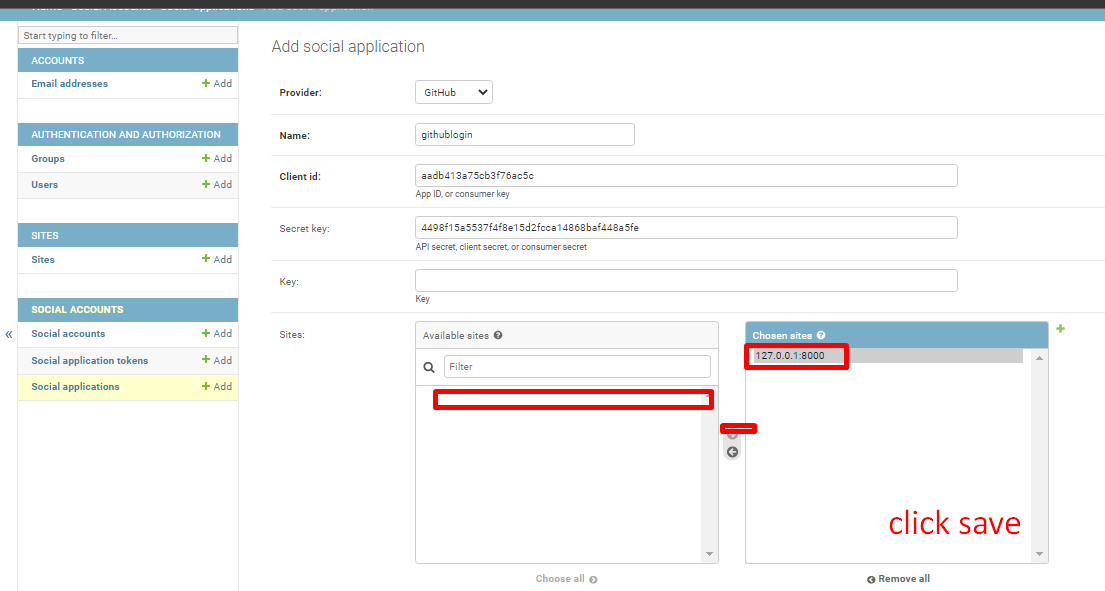
- 1.Provider: Google
- 2.Name: OAuth App
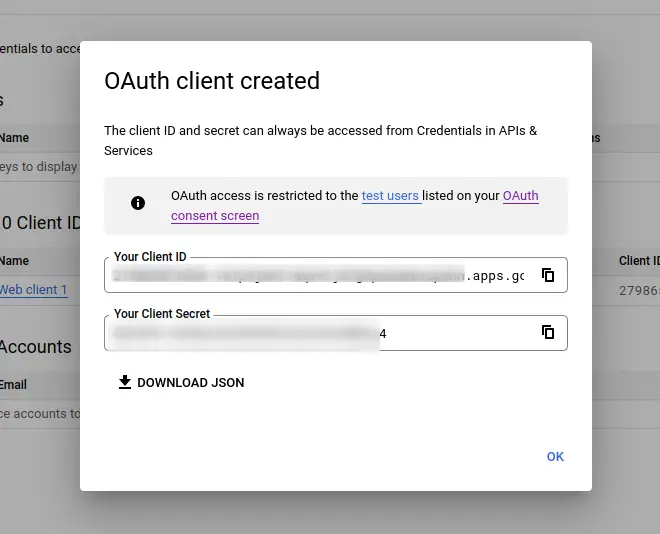
- 3.Client id: [YOUR GOOGLE AUTH CLIENT ID]
- 4.Secret key: [YOUR GOOGLE AUTH CLIENT SECRET]
- 5.Sites: 127.0.0.1:8000
Then, click on Social Applications click Add and fill in the details as follows
Write a caption
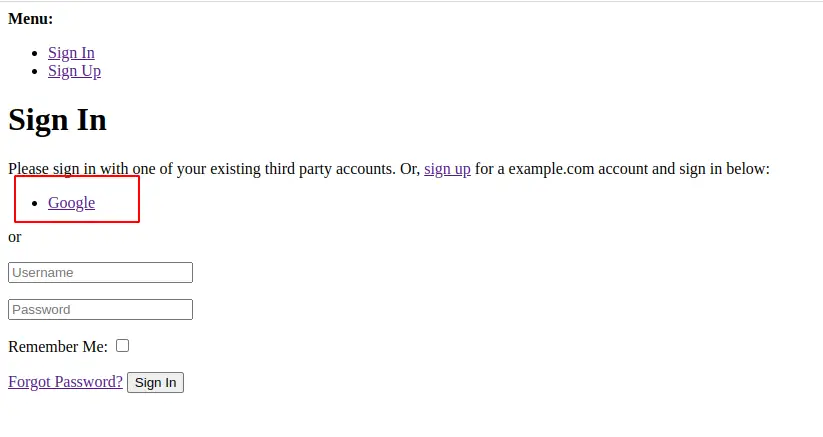
Now logout yourself because you logged in as a superuser and open http://127.0.0.1:8000/accounts/login/ and you can see Google login option.
Write a caption
If you have customized django-allauth templates then you can directly use this code in your template.
{% load socialaccount %}

<h1>Google Login</h1>

<a href="{% provider_login_url 'google'%}?next=/">Login with Google</a>
Facebook Login
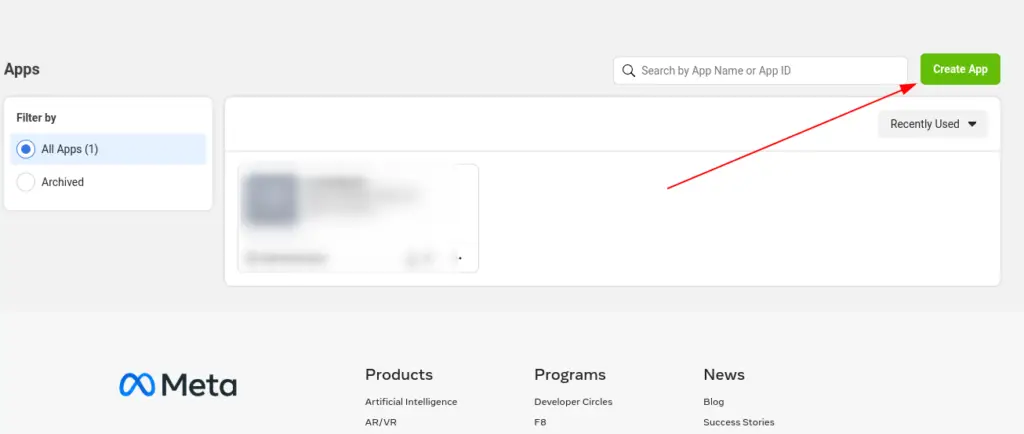
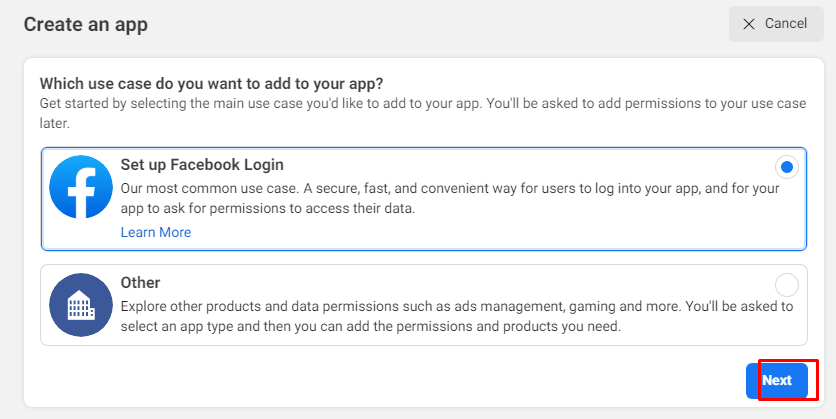
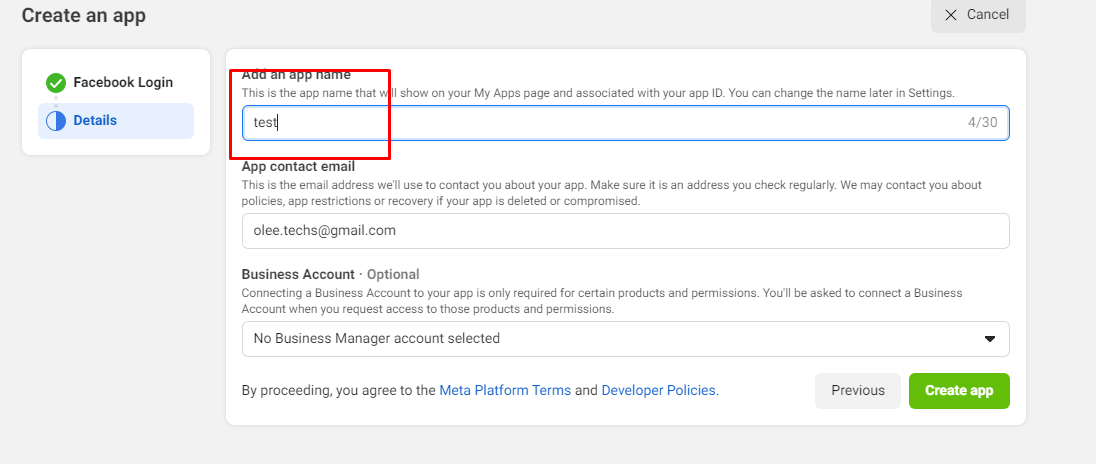
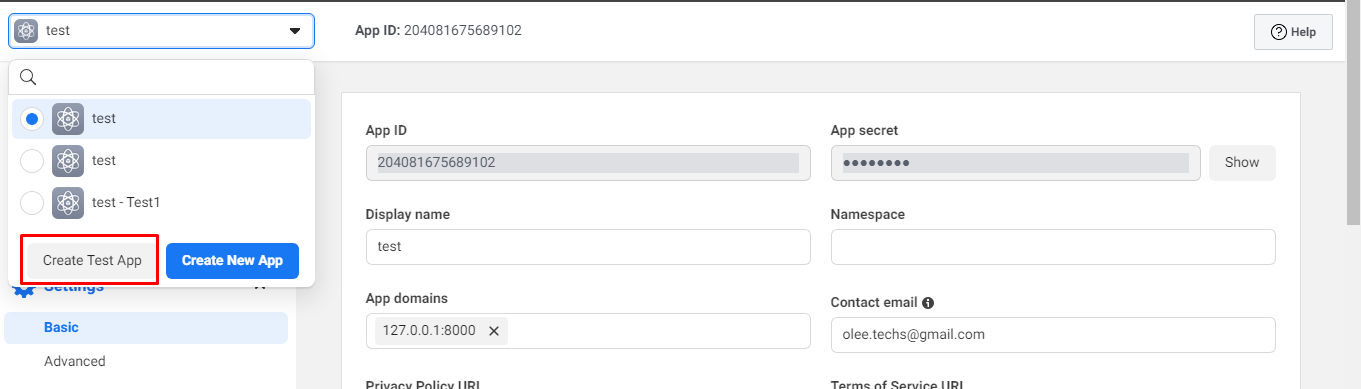
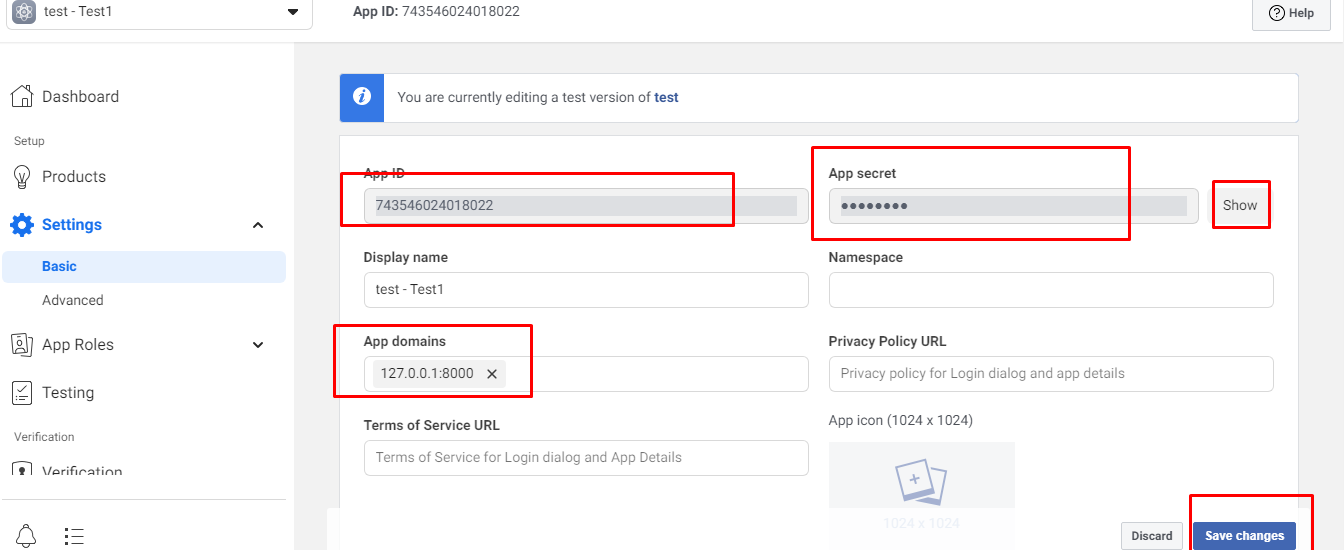
প্রথমে আমরা ফেসবুক এ লগইন করে এই লিংক এ যাই developers.facebook.com এবং একটি app বানাই এবং ছবি অনুসারে কাজ গুলো করি।

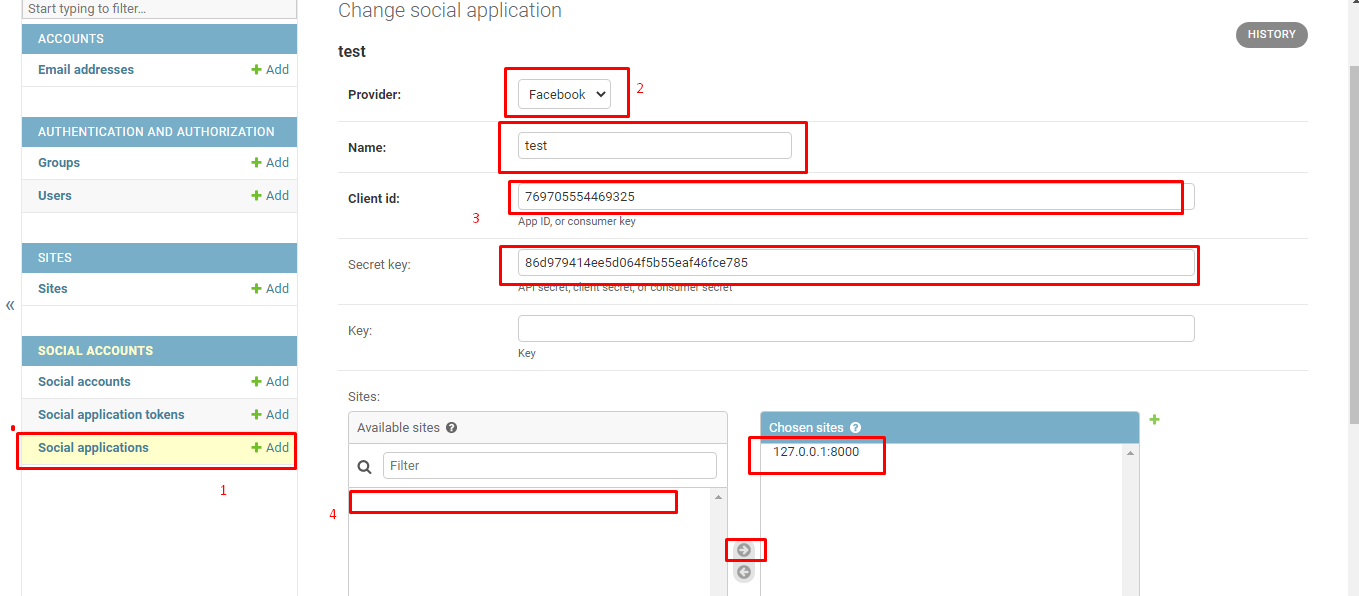
এবার সুপার অ্যাডমিন হয়ে অ্যাডমিন প্যানেলে ঢুকে social application মেনু হতে facebook সেট করি
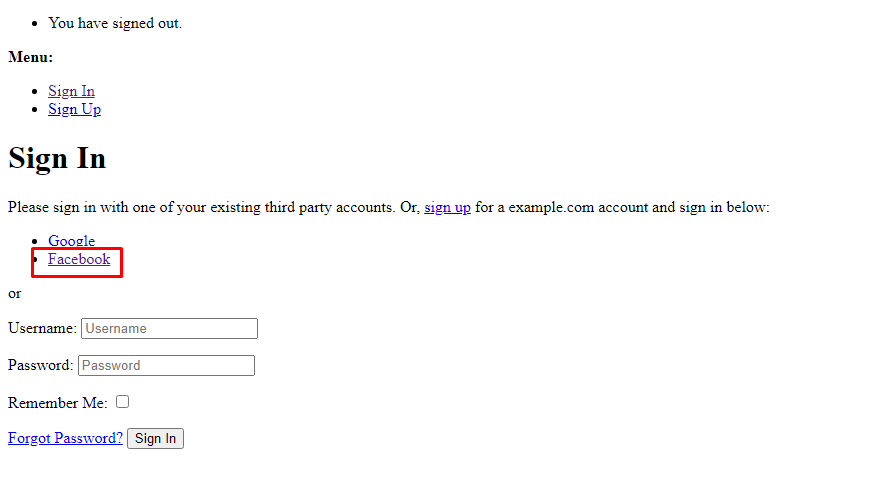
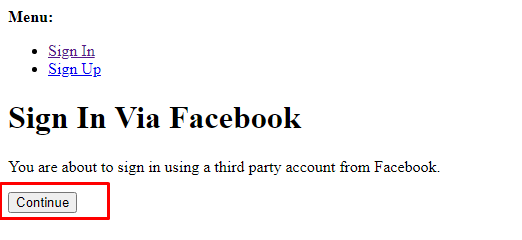
http://localhost:8000/accounts/login/ এখন আমরা লগইন পেজ এ ঢুকলে facebook অপসন দেখতে পারবো
যদি কাস্টম টেম্পলেট ব্যবহার করি তাহলে social লগইন লিংক দেখানোর জন্য নিচের কোডটি লগইন টেম্পলেট এ জুড়ে দেই।
{% load socialaccount %}

{% providers_media_js %}

<a href="{% provider_login_url 'facebook' method='js_sdk' %}">Facebook Login</a>
Github Login
INSTALLED_APPS = [

    'allauth.socialaccount.providers.github', # new (github provider)

]
GitHub OAuth
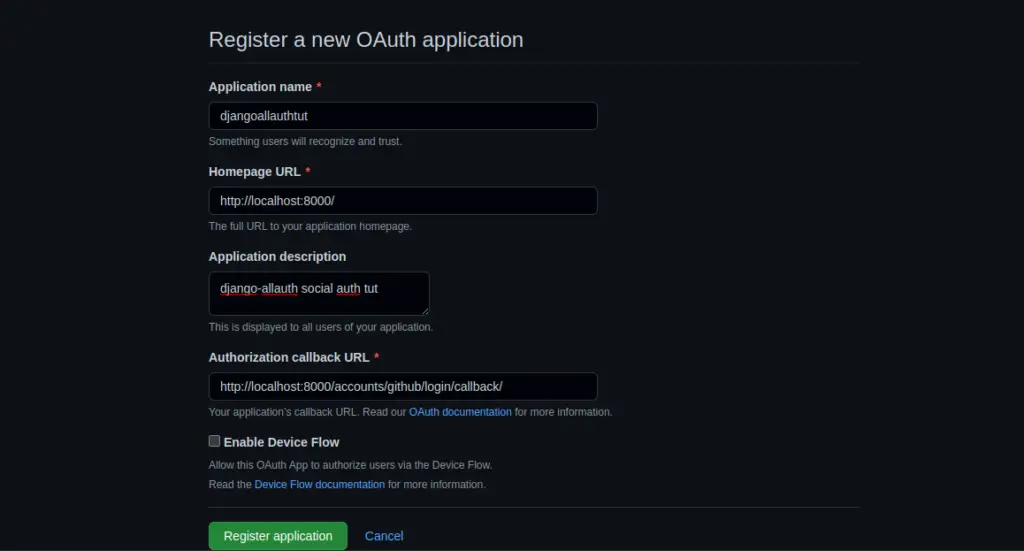
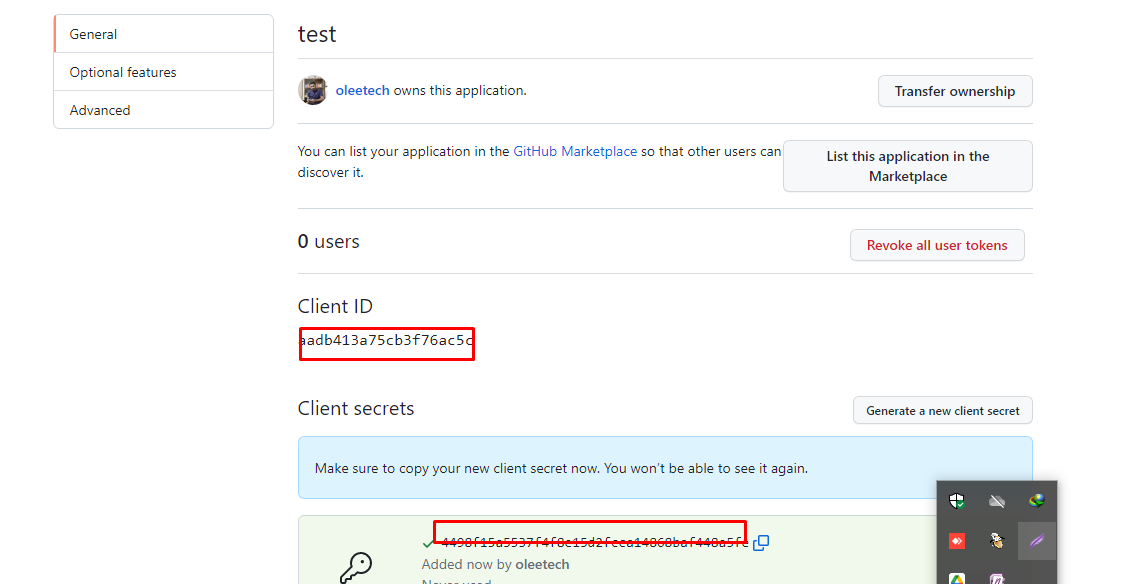
Now open https://github.com/settings/applications/new to get configure the OAuth app in GitHub. You will get a client ID and secret key.
Fill up the details and for
- Homepage URL: http://localhost:8000/
- Authorization callback URL: http://localhost:8000/accounts/github/login/callback/
Then click on Register application
Now log out yourself because you logged in as a superuser and open http://localhost:8000/accounts/login/ and you can see GitHub login option.
If you have customized django-allauth templates then you can directly use this code in your template.
{% load socialaccount %}

<h1>Django Allauth Tutorial</h1>

<a href="{% provider_login_url 'github' %}">Sign Up with GitHub</a>